Subaru Crosstrek and XV Forums banner

What to upgrade next

Offroad Modifications and Pictures

88K views 102 replies 38 participants last post by  born2nd  
#1 · (Edited)
Hey Everyone!

I want to see what you guys are doing for offroad fun. Here's a few pictures of my 2016 XV. Let me know what you think and what I should do next!


#4 ·
I absolutely LOVE how you've modded your Crosstrek! The most bad-a$$ 'trek I've seen IMO.

If you're looking for suggestions about what to do next, might I recommend adding a bull bar to complete the aggressive look.

Keep up the great work and happy off-roading!
 
#5 ·
I dunno about a bull bar. I think that just takes away from the great angles, and the tucked in Light bar is perfect. Might have to steal that idea :)

My buddy has a WRX wagon, and is installing the lift soon, but one of my favorite things he has is a center mount firefly antenna for his CB on he roof basket. I think it makes it look like a little RC car. I said he needs to get a "27mhz" sticker on a flag.


Regardless, OP hasn't made any bad decisions yet on this bad a$$ build!!
 
#6 ·
Thanks guys. I am thinking of fabricating a custom snorkel next, and lifting it 1-2".... But I need consider the raptor supercharger and exhaust... airflow becomes a huge concern once I mod the engine.
 
#9 ·
Snorkel - still a DIY project hope it doesn't leak https://en.m.wikipedia.org/wiki/Hydrolock anywhere.
Supercharger - currently only one I know that is available is from Australia Raptor Superchargers a DIY install, tune $600 extra, $3400-4400 + factor in shipping and freight. No warranty from Subaru and appears to be no warranty for the supercharger.
Exhaust - wheeze burble burble. Inside you may think WRC, outside ricer. IMO if you're going to put an exhaust system on you should be made to hear it the way others do, from outside the car.
Lift - is the most practical off road improvement you can make including tire upgrades Subaru XV Crosstrek Lift Kits - Anderson Design & fabrication does it the best. But don't forget skid plates too!
 
#12 ·
I plan on getting the premium raptor setup, my Aussie contacts will ship it over so I can reduce the freight cost. I design and fabricate with fiberglass as a hobby, so the snorkel is a great weekend project....

The exhaust I think I want to have custom made for me... don't really know how I feel about the ones I've seen so far and there is a Dyno shop here that has agreed to do all my tuning for free (in exchange for having their sticker on my back window).

I definitely need to see some pictures of various lifts before I make a decision there.
 
#11 ·
I think I am going to do the snorkel next (because fiberglass fabrication is a specialty of mine) then follow up with the lift.... should I do 1" to stop any rubbing or 2" ? I think 2" might leave too large a gap between the top of the tire and the wheel opening. Does anyone have any pictures of a 2" lift?
 
#16 ·
If you do go the custom snorkel route, you must post pics. A snorkel is a mod I want really bad for agent orange.

Since you asked for pics. This is my most recent, but I have done some more mods since taking it.
Just about to order a 2" lift for it as well.

How do you like your tires? I ended up going with the Grabbers for mine.
 

Attachments

#18 ·
I did the BFG KM2 215/70R15.... minimal rub, not as loud as I had expected (though still loud) and really, really good traction in the sand and gravel.
The Cons: Not great for emergency stopping on pavement. Those nubs of rubber can't grip the pavement like racing slicks... So I had to increase my following distance in traffic to I have plenty of time to avoid and collisions.

 
#30 ·
Had one heck of a week! Added a water tank with custom bladder (pictures to come) and am working on a sub woofer project now.... Just emailed Anderson Fab about the 2 inch lift!!!! grille, hella horns and other mods on the way. Keep posting pics and sharing your ideas and comments.
 
#31 · (Edited)
PICS!

Just in case you are at all interested at all in an axe shovel mount, the smittybilt mount fits perfectly on the rage/rhino XTray that you have. I just put one on mine the other day and love it. The fitting on the axe and shovel itself is a little wonky but I got it to work. I have a fiskars axe and a fiskars shovel in mine, only problem is the lock you have to use to fit it, but I love mine so far.

Questions:
What tail lights are you running are they oem?
What light bar do you have up top & how is it mounted?
I'm also curious about the reverse lights, I've been thinking of doing something similar.
 
#32 ·
Definitely interested, my shovel is just ratchet strapped for now. Do you have a link for the mounts?

The taillamps are LED, got them off eBay, search "impreza crosstrek led tail lights" they should come up.

The lightbar I ordered from Tripcraft Industries overseas... but any bar should work, mine is 42" curved (all spot)


I custom fabricated the mounts at my work.

The Reverse Lamps... I have three upgrades, the bumper ones and the rear window:


What do you want to know about them?
 
#35 ·
This is it.
https://www.amazon.com/gp/aw/d/B00AQFE6Y0/ref=yo_ii_img?ie=UTF8&psc=1

Make sure you get the one with the rear brackets they fit perfectly on the rails right on top of the plastic X cover. One mount comes with them, one without only a few dollars diffrence.

Yes I'd like to know about the lower ones. The rear window would probably block too much. I'm about to get a rear hitch tire carrier. Mainly just what/where I've been looking to do something somewhat similar.

Yeah the mounts are what I was most curious about. Did you use aluminum or steel. I haven't seen anyone mount a bar there yet. I really like the one you have. Low profile, doesn't stick out too much.
 
#36 · (Edited)
I looked at the shovel mount. I decided to fabricate my own, I think I can make it look a little less bulky.

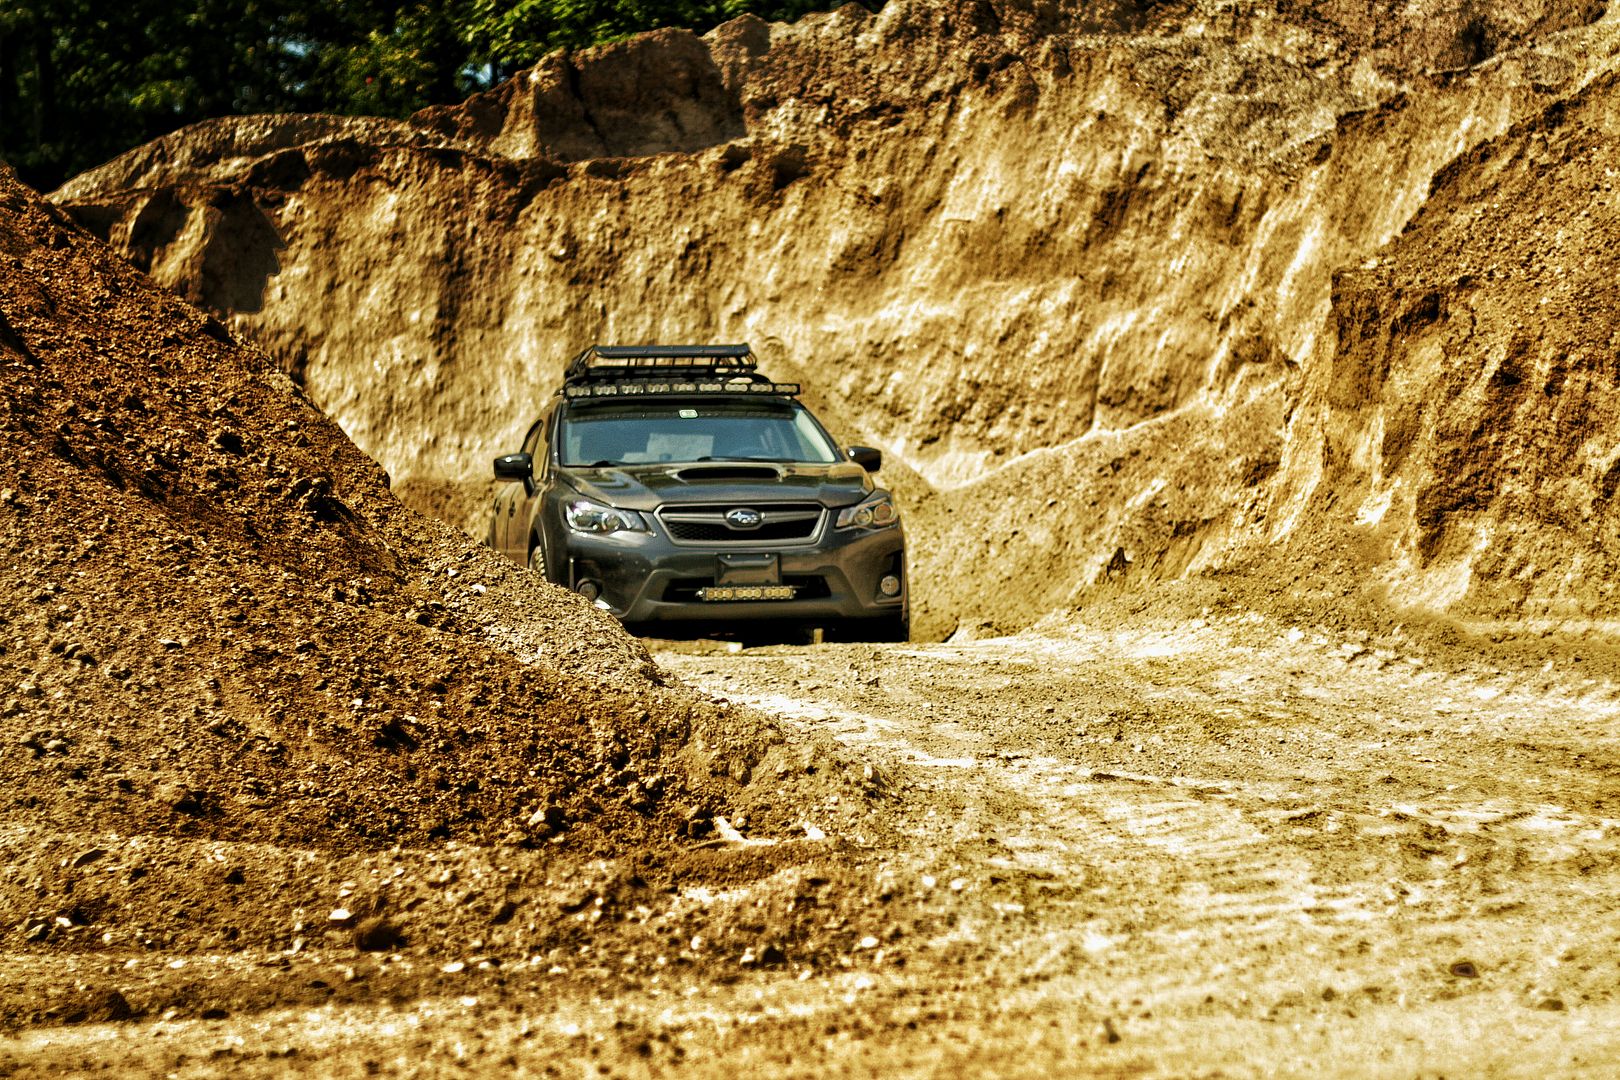
The lower bumper lights are flush mount 24W LED. I had to cut a 3" square in the plastic bumper cover to sink the assemblies into. Between the lamps and bumper cover I layered some foam to smooth the edges and fill the small gap. Behind the bumper cover I fashioned a steel square into which the lamp is secured. However, I did not consider the curvature of the bumper cover and should have bent the bracket slightly before installation to prevent deforming the plastic. The wires I ran up to the tail lamp body harness, there I soldered in my own pigtail to the reverse light power and ground with the corresponding connector on the new bumper lamps. In total, I think it took about 45 minutes to install and cost about $35

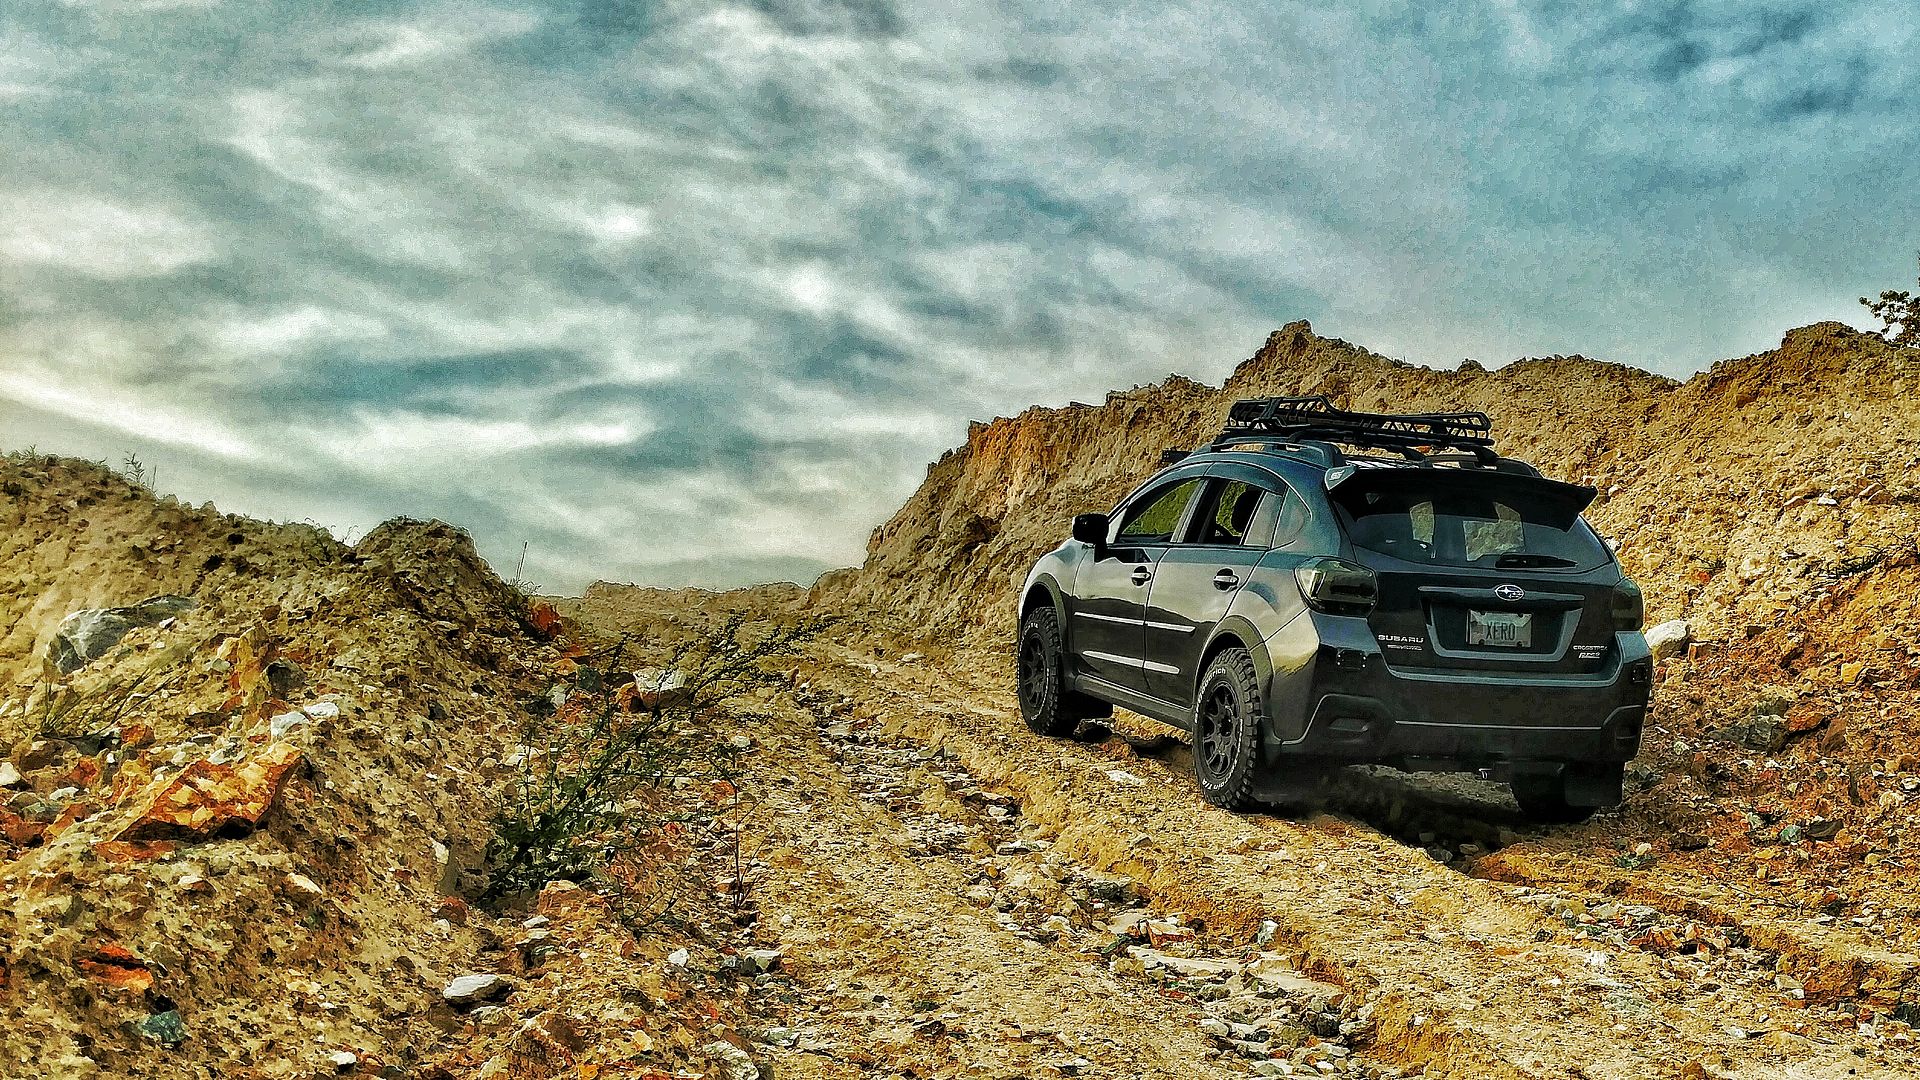
The roof mounts I used 1/8" steel, cut and TIG welded using AUTOCAD (automotive - cardboard aided design) then just primed and painted. I could fabricate custom ones for you if you'd like. Private message me and we can discuss what you are looking for in a mount, and you can send me some dimensions and sketches.
 
#37 ·
Thanks for the run down. Doesn't sound too awfly hard to do, I'm not good with wiring yet though.

Until I saw your light bar mount I had been planning to just attach either a bar or some led pods to my basket. But yours looks so sleak and blends with the car quite nicely. I think I'd want something just like that now.

That would be a future project for me though. I am currently working on getting a lift first. I've been experiencing quite a bit of sag with passengers in the back, and need to get that taken care of first.

I will no doubt be keeping your setup in mind though.