Hi Everyone.
Decided to write this since I haven't seen really any helpful writeups online and took me quite a while to understand how to do this. I did this swap on my 2021 Subaru Crosstrek Premium.
Here are some important things to note.
ALWAYS DISCONNECT YOUR BATTERY PRIOR TO WORKING ON ANY ELECTRONICS IN YOUR VEHICLE
When looking for the Limited MFD ensure you're buying one for the same model year as your car. I suggest Ebay or LKQonline.
My part number was 85263FL110 (Yours could be different)
Adapter can be purchased at AutoHarnessHouse.com (Product number AHH-7729)
Use a plastic Pry Tool as using any metal or hard surface can damage the plastic of your interior.
This is Plug and Play (If done properly)
Once your battery has been disconnected begin by removing the vents adjacent to your head unit. I like to slip my pry tool into the top of the vent slide the tool around the edge and pull the vent out firmly. Repeat this process with the second vent.
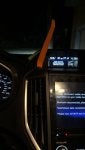
Moving on to the flat piece of plastic above the head unit. Slide the plastic pry tool behind the tab as shown in the image below while using a moderate amount of force to pry the clips out. Use caution as this is a thin piece of plastic.
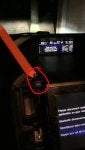
Moving on to the flat piece of plastic in front of the MFD unit. Slip your pry tool into a small slot between the plastic and the trim of the car. (Image shown below) This plastic showed to be most challenging and when removing it. I found best removing it as if I was peeling a sticker to place it on an object. Use moderate force to push the clips toward you (the outside one will come out the easiest) pull out the clip adjacent to it. Repeat this process on the other side of the flat plastic while holding the side you just pulled out to prevent the clips from snapping back in. (Sorry if this was confusing I couldn't think of any other way of describing it)
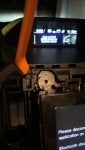
Once done you will find that the screws to the MFD are exposed. Unscrew them leaving them in a safe place as they're easy to lose. Once unscrewed the clips holding the MFD are a simple up and out motion. Once removed you will find a small 12 pin male connector which is plugged into the MFD. Remove this and leave it as it will be crucial for later.
Grab your adapter listed in the thread above and insert the male adapter into the female 12 pin female connector. Insert the 24 pin male adapter into the new MFD unit. Following this run the adapter down into the hole under the flat piece of plastic toward your head unit.
Unscrew the 4 screws of your head unit and store them in a safe place as they're easy to lose. Disconnect the 12 pin wire holding the screen in giving you some slack.(This runs directly to your MFD if im correct) Following this pull your head unit toward you so it's hanging out but do not disconnect wires as it is not necessary but for your adapter. Find at the bottom as their is only one, 24 pin male connector in this vehicle unplug it and attach the adapter while placing the new 24 male pin into the female 24 pin. This is crucial as it will supply all the information necessary for your Color MFD to work.
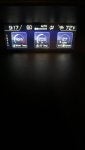
Once you have completed these steps reconnect your battery to ensure your MFD is working properly. I have seen mixed reviews online when others have had issues with some aspects not working. Only the "Push and Hold info for selection screen" was inoperable.
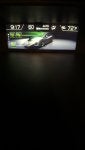
I will post some images below of everything working as it should.
Decided to write this since I haven't seen really any helpful writeups online and took me quite a while to understand how to do this. I did this swap on my 2021 Subaru Crosstrek Premium.
Here are some important things to note.
ALWAYS DISCONNECT YOUR BATTERY PRIOR TO WORKING ON ANY ELECTRONICS IN YOUR VEHICLE
When looking for the Limited MFD ensure you're buying one for the same model year as your car. I suggest Ebay or LKQonline.
My part number was 85263FL110 (Yours could be different)
Adapter can be purchased at AutoHarnessHouse.com (Product number AHH-7729)
Use a plastic Pry Tool as using any metal or hard surface can damage the plastic of your interior.
This is Plug and Play (If done properly)
Once your battery has been disconnected begin by removing the vents adjacent to your head unit. I like to slip my pry tool into the top of the vent slide the tool around the edge and pull the vent out firmly. Repeat this process with the second vent.
Moving on to the flat piece of plastic above the head unit. Slide the plastic pry tool behind the tab as shown in the image below while using a moderate amount of force to pry the clips out. Use caution as this is a thin piece of plastic.
Moving on to the flat piece of plastic in front of the MFD unit. Slip your pry tool into a small slot between the plastic and the trim of the car. (Image shown below) This plastic showed to be most challenging and when removing it. I found best removing it as if I was peeling a sticker to place it on an object. Use moderate force to push the clips toward you (the outside one will come out the easiest) pull out the clip adjacent to it. Repeat this process on the other side of the flat plastic while holding the side you just pulled out to prevent the clips from snapping back in. (Sorry if this was confusing I couldn't think of any other way of describing it)
Once done you will find that the screws to the MFD are exposed. Unscrew them leaving them in a safe place as they're easy to lose. Once unscrewed the clips holding the MFD are a simple up and out motion. Once removed you will find a small 12 pin male connector which is plugged into the MFD. Remove this and leave it as it will be crucial for later.
Grab your adapter listed in the thread above and insert the male adapter into the female 12 pin female connector. Insert the 24 pin male adapter into the new MFD unit. Following this run the adapter down into the hole under the flat piece of plastic toward your head unit.
Unscrew the 4 screws of your head unit and store them in a safe place as they're easy to lose. Disconnect the 12 pin wire holding the screen in giving you some slack.(This runs directly to your MFD if im correct) Following this pull your head unit toward you so it's hanging out but do not disconnect wires as it is not necessary but for your adapter. Find at the bottom as their is only one, 24 pin male connector in this vehicle unplug it and attach the adapter while placing the new 24 male pin into the female 24 pin. This is crucial as it will supply all the information necessary for your Color MFD to work.
Once you have completed these steps reconnect your battery to ensure your MFD is working properly. I have seen mixed reviews online when others have had issues with some aspects not working. Only the "Push and Hold info for selection screen" was inoperable.
I will post some images below of everything working as it should.